Homemade Peanut Butter Cups with Cashew Butter
Uitgelicht onder: Creatieve bakinspiratie
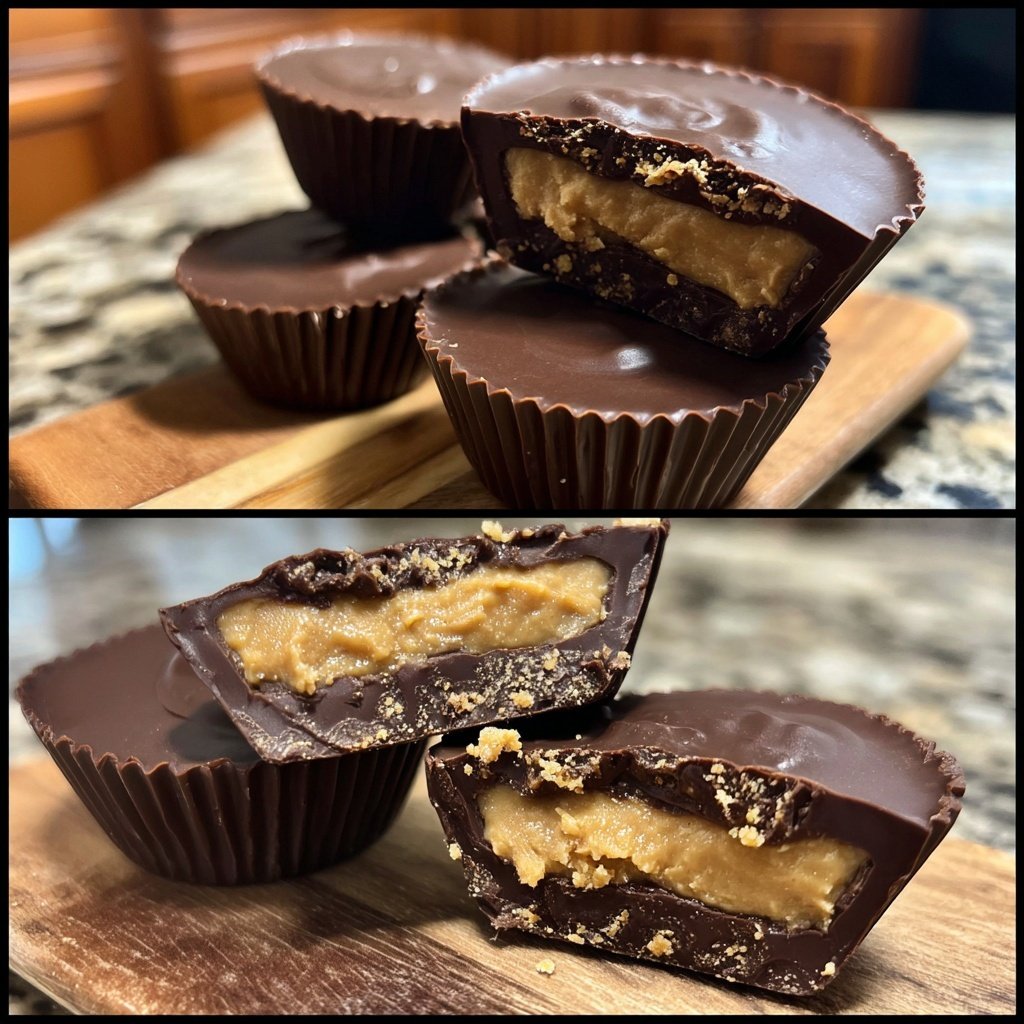
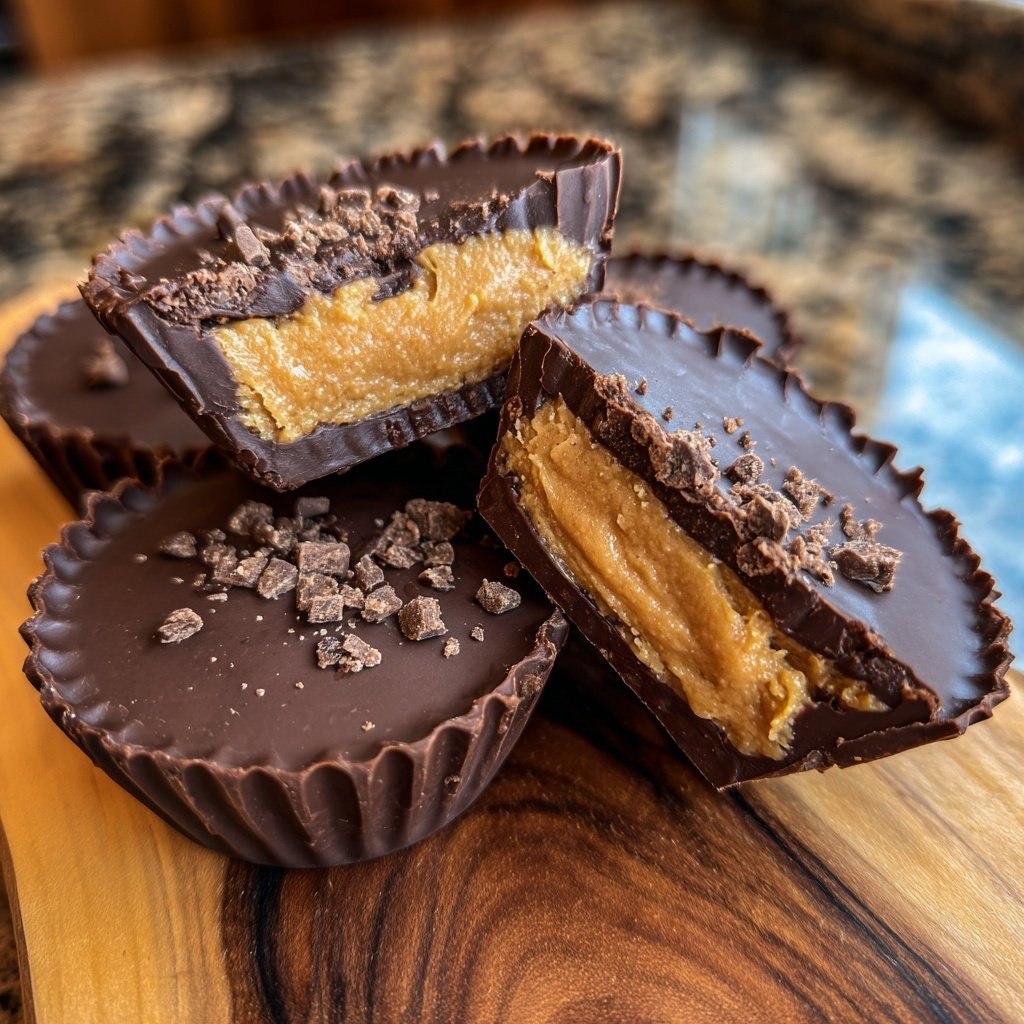
I love making these Homemade Peanut Butter Cups with Cashew Butter because they offer a delightful twist on the classic treat. The combination of creamy cashew butter and rich chocolate makes for a sweet indulgence that’s hard to resist. In just a little bit of time, I can whip up a batch that’s perfect for sharing or keeping as a personal stash. Each bite is a balance of flavors that leaves my taste buds dancing. Plus, knowing I made them from scratch adds a special touch to my snacking experience.
When I first decided to make these peanut butter cups, I wanted to do something different by using cashew butter. The creaminess of cashew butter pairs beautifully with chocolate, making each bite not only satisfying but also uniquely flavorful. I also experimented with the chocolate coating and discovered that melting a mix of dark and milk chocolate gives the cups an amazing depth of flavor.
As I crafted my homemade treats, I found that using silicone molds was a game-changer. They make it incredibly easy to pop the cups out without breaking them. In fact, I recommend chilling the cups in the freezer for a few minutes before popping them out to maintain their shape. Trust me, the end result is worth the wait!
Why You'll Love This Recipe
- Deliciously creamy cashew butter for a unique flavor
- Rich chocolate coating adds a decadent touch
- Easy to make with minimal ingredients
Choosing the Right Chocolate
For these Homemade Peanut Butter Cups, using high-quality chocolate is essential for achieving that luxurious melt-in-your-mouth experience. I recommend opting for dark chocolate with a cocoa content of at least 60% for a rich flavor that balances perfectly with sweet cashew butter. If you prefer a sweeter taste, you can adjust the milk chocolate ratio in the coating, but ensure dark chocolate still remains a primary element for depth.
When melting chocolate, be careful not to overheat it, as this can cause the chocolate to seize, becoming grainy and unusable. Stirring regularly during the melting process helps maintain a smooth consistency. If chocolate does seize, you can attempt to salvage it by adding a small amount of vegetable oil, which may help restore its fluidity.
Texture and Flavor Enhancements
The creamy texture of cashew butter is the star of this recipe, but you can experiment with using other nut butters, such as almond or even sunflower seed butter for a different flavor profile. Make sure that these substitutes are similarly creamy and smooth to achieve that delightful contrast with the chocolate. I'd also suggest considering a pinch of cinnamon or vanilla extract in the cashew butter mixture for an aromatic enhancement.
The combination of powdered sugar in the cashew butter filling helps to achieve the desired sweetness and also thickens the mixture to prevent it from becoming too runny. This balance is crucial for ensuring that each bite has just the right amount of creaminess without spilling out. If you're looking to reduce sugar, using a sweetener like maple syrup or agave may work, though it can alter the texture slightly.
Storing and Serving Tips
Once your Peanut Butter Cups are set and out of the molds, they should be stored in an airtight container in the refrigerator to maintain their freshness and firmness. These treats can last for up to two weeks, making them a great option for meal prep or as a snack on hand. You can also freeze them; just make sure they are well-wrapped to prevent freezer burn. They’ll keep well for up to three months if stored correctly.
For a creative serving suggestion, consider plating the cups with a sprinkle of flaky sea salt or shredded coconut on top for added flavor and visual appeal. You could also pair them with fresh fruit or a scoop of ice cream to elevate your dessert experience. These homemade treats can quickly become an impressive addition to any occasion, showing off your culinary skills.
Ingrediënten
Gather the following ingredients to get started on your homemade peanut butter cups.
Ingredients
- 1 cup cashew butter
- 1/2 cup powdered sugar
- 1 cup dark chocolate chips
- 1/2 cup milk chocolate chips
- 1 tablespoon coconut oil
- Pinch of salt
Once you have all your ingredients ready, you can begin the fun part—making your peanut butter cups!
Bereidingswijze
Follow these simple steps to create your homemade peanut butter cups.
Prepare Chocolate Coating
In a microwave-safe bowl, combine the dark chocolate chips, milk chocolate chips, and coconut oil. Microwave in 30-second intervals, stirring in between, until fully melted and smooth.
Fill the Molds
Pour a small amount of the melted chocolate into the bottom of silicone molds, just enough to cover the base. Place the molds in the freezer for about 5 minutes to set.
Add Cashew Butter Filling
In a separate bowl, mix the cashew butter with powdered sugar and a pinch of salt. Once the chocolate has set, add a dollop of the cashew mixture into each mold.
Top with More Chocolate
Cover the cashew butter with the remaining melted chocolate until fully sealed. Return to the freezer for an additional 10 minutes to set completely.
Serve and Enjoy
Once the cups are set, gently pop them out of the molds and enjoy your homemade peanut butter cups!
Now that you've crafted your delightful treats, it's time to savor the deliciousness!
Professionele Tips
- Store your peanut butter cups in the fridge to keep them fresh. They can also be frozen for longer storage, ensuring a sweet treat is always on hand.
Troubleshooting Common Issues
If you find that your chocolate isn't setting properly, it may be due to moisture contact during the melting or cooling process. Always ensure that both chocolate and the molds are dry. If you accidentally overheat your chocolate, remember to keep a close eye while microwaving, as just a few extra seconds can lead to a grainy texture. If this happens, adding a bit of coconut oil can help smooth it out.
Another common issue is getting the cashew butter to firm up. If your mixture is too runny after adding powdered sugar, consider adding a bit more sugar or refrigerating it for a few minutes to help it thicken before adding to the molds. A thicker mixture will create distinct layers in your cups and enhance the overall texture.
Adjusting for Dietary Needs
For a vegan option, ensure that the chocolate chips you use are dairy-free, as many brands contain milk fat. There are several delicious vegan chocolate options available that do not compromise on taste. Additionally, replacing the powdered sugar with a keto-friendly sweetener can make this dessert suitable for low-carb diets while still keeping the sweetness intact.
If you or someone you're serving has nut allergies, using seed butters like sunflower seed butter could be a viable alternative. It mimics the creamy texture of nut butters and allows those with nut allergies to enjoy a similar treat without concern. Just be aware that the flavor profile will shift slightly, so consider adjusting your chocolate type or even incorporating flavor extracts to enhance it.
Vragen Over Recepten
→ Can I use another type of nut butter?
Absolutely! Almond butter or sunflower seed butter also work well if you're looking for alternatives.
→ How long can I store these peanut butter cups?
They will last about a week in the fridge and up to three months in the freezer.
→ Is it possible to make these vegan?
Yes! Use dairy-free chocolate and ensure your cashew butter doesn't contain any animal products.
→ What can I add to the cashew butter for extra flavor?
Feel free to add in vanilla extract or a pinch of cinnamon for a unique twist.
Homemade Peanut Butter Cups with Cashew Butter
Gemaakt door: Bryony Wells
Recepttype: Creatieve bakinspiratie
Vaardigheidsniveau: Beginner
Eindportie: 12 cups
Wat je Nodig Hebt
Ingredients
- 1 cup cashew butter
- 1/2 cup powdered sugar
- 1 cup dark chocolate chips
- 1/2 cup milk chocolate chips
- 1 tablespoon coconut oil
- Pinch of salt
Stappen
In a microwave-safe bowl, combine the dark chocolate chips, milk chocolate chips, and coconut oil. Microwave in 30-second intervals, stirring in between, until fully melted and smooth.
Pour a small amount of the melted chocolate into the bottom of silicone molds, just enough to cover the base. Place the molds in the freezer for about 5 minutes to set.
In a separate bowl, mix the cashew butter with powdered sugar and a pinch of salt. Once the chocolate has set, add a dollop of the cashew mixture into each mold.
Cover the cashew butter with the remaining melted chocolate until fully sealed. Return to the freezer for an additional 10 minutes to set completely.
Once the cups are set, gently pop them out of the molds and enjoy your homemade peanut butter cups!
Extra Tips
- Store your peanut butter cups in the fridge to keep them fresh. They can also be frozen for longer storage, ensuring a sweet treat is always on hand.
Voedingswaarde (Per Portie)
- Calories: 380 kcal
- Total Fat: 26g
- Saturated Fat: 15g
- Cholesterol: 0mg
- Sodium: 85mg
- Total Carbohydrates: 32g
- Dietary Fiber: 3g
- Sugars: 24g
- Protein: 6g